


Betty’s Garden Diary for April 2016
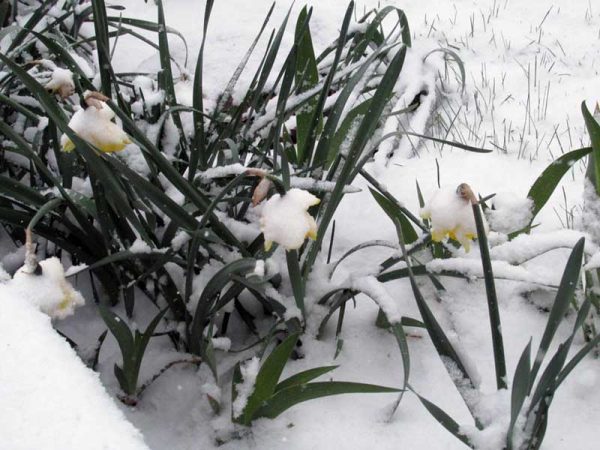
Betty’s Daffodils Blooming in April
Spring has arrived, but it did so with a wintry blast during the end of March and first of April. We got Betty’s garden tilled before the snow returned, but did not get our peas, onions, or early sweet corn planted in late March as planned. The return of winter during late March and the first couple of weeks of April delayed everything in Betty’s Garden, but spring has returned allowing us to plant the cabbages, onions, sugar snap peas and sweet corn that we had hoped to plant around the end of March.

Betty’s Daffodils Blooming on Easter
In this issue of the Garden Diary, we will discuss planting fruit trees, setting out bedding plants, planting corn and sugar snap peas, and taking care of your lawn, and the cicada invasion.
By the time you read this, you may have already cut your lawn a couple of times. Grass loves springtime with the cool nights and bright sunny days and abundance of water. It seems like the lawn needs cut every couple of days because it grows so fast during this time of year. If you haven’t already done so, this is the time to do some maintenance work on your lawnmower. Start by disconnecting the spark plug wire and securing it in a location where it cannot come into contact with the spark plug while you are working on the mower. That way, it cannot accidentally start while you are working under the mower. The next thing to do is to empty the fuel tank so that you do not spill gasoline when you turn the mower over to work on the underside of the deck. When you tilt the mower on the side to empty the fuel tank, always tilt it away from the carburetor so that the engine oil does not run into the carburetor. After emptying the fuel tank, turn the mower onto the side away from the carburetor and remove the blade. You may need to rotate the blade so that a block of wood can be wedged between the blade and the grass chute while you loosen the blade bolt. Always rotate the blade toward the cutting edge since that is the direction that the engine rotates. Double check to be sure the spark plug wire is away from the spark plug to ensure that the engine does not fire when you rotate the blade. After you remove the blade, you will be able to scrape the dried grass and other debris from the underside of the deck. We are fortunate enough to have a power washer, but we still need a wire brush to get it all off. While it is drying, we will drain out the engine oil which hasn’t been changed since last year. Just remove the oil drain plug and then turn the mower right side up over a small pan. We use an old metal cake pan.
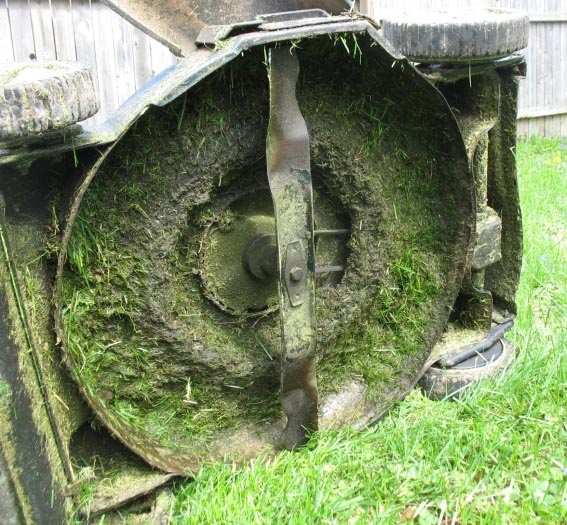
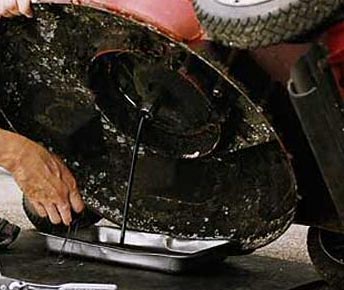
Always tilt the mower away from the carburetor. We use an old cake pan to catch the oil.
Loosening or removing the oil filler plug to allow air into the crankcase will help the old oil to drain more quickly. While the old oil is draining, we use a bench grinder to sharpen the blade. If the blade is bent or damaged, replace it. Note that the blade is sharpened only on one side. Be sure to retain the original blade sharpening angle. Take care to remove the same amount of metal from both ends of the blade to prevent the blade from becoming unbalanced and damaging the engine. Use a file or sharpening stone to remove the wire edge from the flat side of the blade. Don’t forget to replace the oil drain plug before you reinstall the blade. A sharp blade cuts more cleanly causing less damage to the grass plants and also chops the clippings into finer pieces thereby helping them to break down faster. This is also a good time to apply a coat of spray paint to the underside of the mower deck to prevent rust. There is actually spray paint made for the underside of the mower deck, but we use whatever happens to be on hand. Before you reinstall the blade, put a drop of oil on the threads of the blade bolt. The oil will keep the bolt from rusting inside the shaft and make it easier to remove the next time. Don’t over tighten the bolt. Remember to put new motor oil in the engine. Consult your owner’s manual to see what kind of oil is recommended. If you do not have an owner’s manual, just use a good brand of SAE 30 grade motor oil. Be sure to put a couple of drops of oil onto the axle of each wheel. Remove the top of the air cleaner on the carburetor and take out the sponge rubber air cleaner element. A good way to clean that foam rubber filter is with warm water containing a few drops of dish detergent. Be sure to thoroughly rinse out the detergent and then squeeze the air filter dry before reinstalling it. Reconnect your spark plug wire. Then, add some fresh gasoline and you are ready to mow. We also have a lawn tractor with a mower deck. Every spring and a couple of times during the summer, we remove the deck so that we can turn it over to clean and spray paint the underside of it. This is also the time to change the oil and clean the air filter of the engine on your riding mower or lawn tractor and to lubricate the steering mechanism and front wheels. Some of those parts have grease fittings, so you will need a grease gun which you can obtain at any garden department. The last thing you need to remember to do is adjust the cutting height of your lawn mower.
Many people cut their grass too short. A good height for most grasses is between two and three inches. We keep our mowers set to 2.5 inches. Cutting the grass too short prevents the grass plants from developing healthy root systems thereby making them more susceptible to damage during dry weather. The rule of thumb is to cut off no more than one third of the height of the grass when you mow your lawn. If you are keeping your grass one inch high, then you would need to mow it every time it grows a half an inch and becomes 1.5 inches long. If you maintain your grass at a height of three inches, then you would mow it when it gets to be 4.5 inches high. Most of the time, the grass clippings should be left on the lawn to be recycled as organic fertilizer. During the spring when the grass is rapidly growing, we usually collect some of the clippings and use them to mulch our garden plants. If the clippings are visibly covering the grass when they dry, then they should be removed and added to your garden or compost pile. We do not fertilize or chemically treat our lawn, so dandelions and thistles often appear. We remove those using the homemade tool shown below. If you have a hacksaw and a file, you can make a similar tool from a short section of ¾ inch electrical conduit and a rake handle. Both of those are available from any home improvement store. Most garden centers also sell tools, like the one pictured below, for removing dandelions.
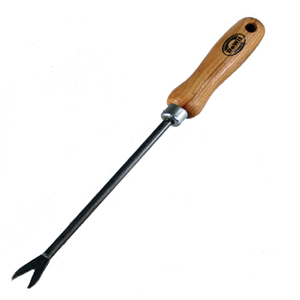
Dandelion Removal Tool
If you are planning to plant some fruit trees, now is the time to do so. The best time to plant them is before they break dormancy which has likely already happened. If they are bare rooted trees, they will dry out if they are not planted soon enough. If the weather does not permit you to plant them, heel them in by opening a slit in the ground with a shovel and putting the roots into it. Be sure to keep them watered until you are able to transplant them into the final location. When you are planting a potted or balled and tied tree, make the planting hole larger than the ball of dirt on the tree roots. Remove the burlap before you plant the tree and use your fingers or any pronged tool to loosen the root ball. Potted trees are often root bound, so loosening the roots is an important step. Several years ago, we helped some friends dig out some shrubs that had been in place for ten or more years. When we dug the shrubs up, we found them to be completely root bound with the burlap wraps still in place. Backfill the planting hole with loose topsoil or potting soil so that the ground level of the soil surrounding the hole matches the original ground level of the soil with the tree. As you backfill the planting hole, firmly tamp the soil in place without compacting it. If there are deer in your neighborhood, you will want to protect your new tree by slitting a section of slotted drain pipe and slipping it over the trunk of the tree. You may also need to fence around the tree to keep the deer from eating the leaves and new growth. If the tree is very tall, you will need use stakes it to keep it straight in the ground until the roots become established. Use three stakes surrounding the tree in a triangle. Be sure to pad the cords or wires where they surround the tree and make sure to leave them loosely attached to provide room for the tree to grow. The last step is to water the tree. The first watering should saturate the soil in the planting hole. Do not walk on the saturated soil and do not tamp down the wet soil to avoid compacting it. Water the tree frequently during the first few weeks until the root system becomes established.
This spring, we are expecting a visit from the 17 year cicadas. Based on the number of cicada grubs we found when we installed a new water hydrant last summer, there will be a big swarm in our part of the country.
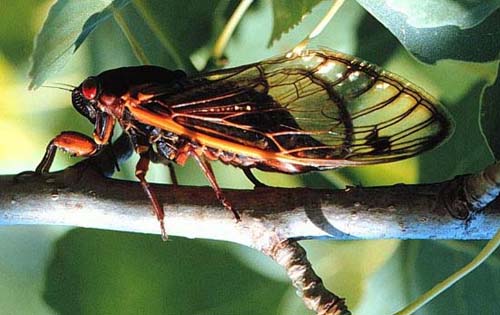
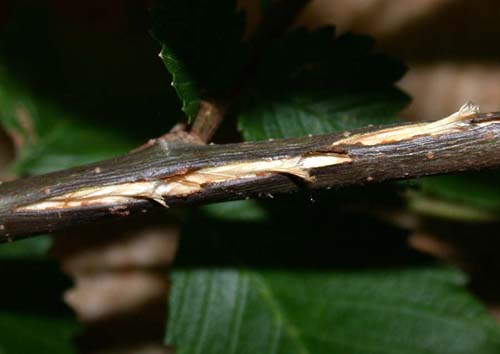
As shown in the picture on the left, the female cicadas inject their eggs into the small branches of the trees. The picture on the right shows the damage caused by the cicada egg laying. Some of those small branches and twigs become deformed or die and fall to the ground. For a well-established tree, the loss of these small branches and twigs does no real damage. However, the egg laying damage can seriously impact small newly planted trees or small fruit trees, so you should protect those from the cicadas with mesh coverings which are available through most garden centers. For more complete information about the cicadas, click this link to visit the Indiana University Cicada Project web page.
During the dry weather in March, we did the first spring tilling in Betty’s vegetable garden. Then, winter returned, so we did not get any peas, onions, or early sweet corn planted. Thanks to the nice weather in mid April, the second tilling is completed and we have corn and peas, planted and have set out onion and cabbage plants. All of those plants can withstand a light frost. The National Weather service puts the average last frost date in Ohio County at late May. Check out the National Weather Service Spring Freeze map for WV at this link. The old timers always called May 15 “Vine Day” meaning that it was safe to plant vine crops like cucumbers and pumpkins after May 15. Vine Day is also a good time to plant other crops that are easily harmed by frost. Our May issue will include advice about setting and managing tomatoes and peppers and planting the more frost sensitive crops.

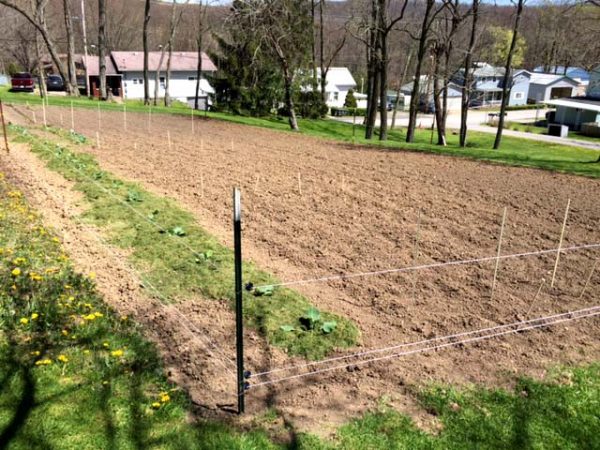
Betty Planting Sweet Corn
We plant our sweetcorn as soon as the soil has dried enough in the spring and the soil temperature has warmed enough for the seeds to germinate. Since we use a walk behind rototiller between the corn rows, we plant the corn rows three feet apart. We space the seeds about six inches apart in the rows and plant the corn about two inches deep. About a week after the corn comes up, we replant in any spaces where the seeds did not germinate. Our replanting system consists of a section of half inch PVC water pipe with a dowel rod inside. We simply push the pipe two inches into the soil with the wooden rod inside to prevent the tip from being plugged up with soil. Then we pull out the dowel, drop in a kernel of seed corn, pull the pipe out of the soil, and use a foot to lightly tamp the soil around the seed. This system works well and eliminates stooping. Having some corn stalks that germinate a week after the others is not a problem because it extends our corn harvest for a few days. As you can see from the picture above, Betty’s corn patch consists of three twenty foot long plots. Each plot consists of five rows of corn. Closest to the end of the garden, we plant Early Sunglow which ripens first. The middle plot is planted with a variety called Ambrosia which is a longer season variety. The plot farthest from the fence also contains Ambrosia, but it will not be planted until mid May. The staggered plantings provide for a longer harvest season. If we have a good year, the Ambrosia plantings should provide plenty of corn for the freezer. Planting the corn in clusters of short rows provides for better pollination and fuller ears of corn. Deer and rabbits both love to munch on cabbage, pea, onion and sweetcorn plants, so we put up our electric fence when we plant those. After the corn is three or four inches tall, we often put a small amount of urea fertilizer along each row about three inches away from the plants. Urea is a high nitrogen fertilizer. Although urea fertilizer is man-made, urea is found naturally in poultry manure. If you side dress with urea, use a very small amount and be sure to cover it with soil. You can also put a very tiny amount of urea on leafy crops like lettuce and cabbage. Do not put urea on tomatoes, peppers, beans, or peas. If you do, you will have large plants with no fruit or that produce fruit very late in the season. Urea is sometimes sold as lawn fertilizer. If you buy urea lawn fertilizer, make sure that it does not also contain weed killers or insecticides that you do not want in your garden.
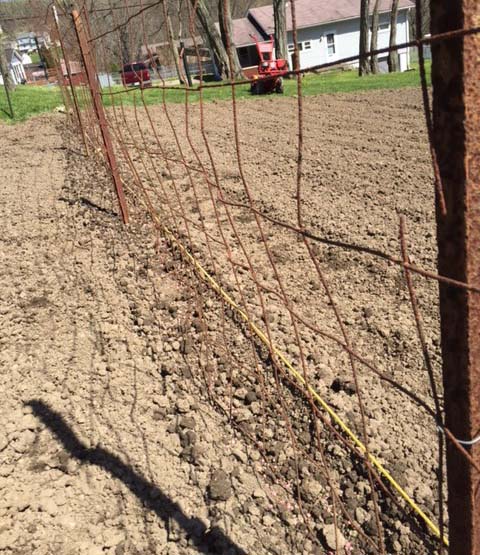
The Pea Fence
We support our sugar snap peas with a forty foot long pea fence that we made about 35 years ago using concrete reinforcing wire. Around that time, we purchased a roll of the reinforcing wire and used it to make tomato cages and the pea fence. It was expensive at the time, but it was a long term investment. To plant the peas, we make a trench about six inches wide and two inches deep. The, we scatter the seeds in the trench. We plant the peas thick using about half a pound of seeds for the forty foot long row. After we cover the seeds with loose soil, we set a series of steel posts in the row and attach the pea fence. As the peas grow, we use cords to tie them to the fence and keep them from falling over. The peas will be producing by June. For the benefit of the photo above, we installed the fence before covering the seeds. The pea fence looks a little old because it has been in use for over 35 years!
After setting our cabbage plants, we mulched around them with grass clippings to preserve moisture.
This is the time to begin thinking about water management in the garden. We all enjoyed the nice weather this winter and the fact that we didn’t need to shovel much snow, however, the result was a lower than normal amount of precipitation for this area. In fact, the National Oceanic and Atmospheric Administration records indicate that our part of the country was in drought conditions for most of the months from August, 2015 until now.. Click here to visit their web site. If those dry conditions persist, they will impact our gardens, but there are some things we can do. The most important is to use mulch to preserve moisture and to encourage rain water to soak into the soil instead of running off. We are fortunate enough to have a large lot from which we can collect grass clippings. We are also able to collect grass clippings from a couple of neighboring lots. Those folks are very happy to have us mow their lawns in exchange for the clippings. We also keep the soil surface in our garden a little rough to slow down runoff water and enable it to soak into the soil. Since Betty’s garden has a slope of almost seven percent, the mulch and rough soil surface also helps to prevent topsoil erosion.
Bedding plants need a lot of water to get them started. When we set our plants, we form a level area around them to encourage the water to soak into the soil. We water the plants early in the morning or in the evening rather than during the hot part of the day when the water evaporates more quickly. If the plants are showing signs of distress such as wilting, we will water them any time. If the weather turns dry, we will use a soaker hose or a sprinkler hose, but we use both of those in the evening. During the hottest part of the day, a significant portion of the water from a sprinkler hose is lost to evaporation. For our tomato and pepper plants, we sometimes also use drip irrigation. If the weather stays dry, we will discuss more irrigation options in future Garden Diary issues.
If your reaction after reading Betty’s Garden Diary is that we are not doing anything special or exceptional, then you are exactly right. We are just a couple of folks who grew up on farms and continue to garden as we did back home. Our garden is not a showcase. We grow the things that we use. If you have never gardened before, give it a try. Our hope is that by just describing the normal things that we do, we can help the folks who are gardening for the first time. Please comment and contribute your gardening ideas so that we can make this a community effort!