

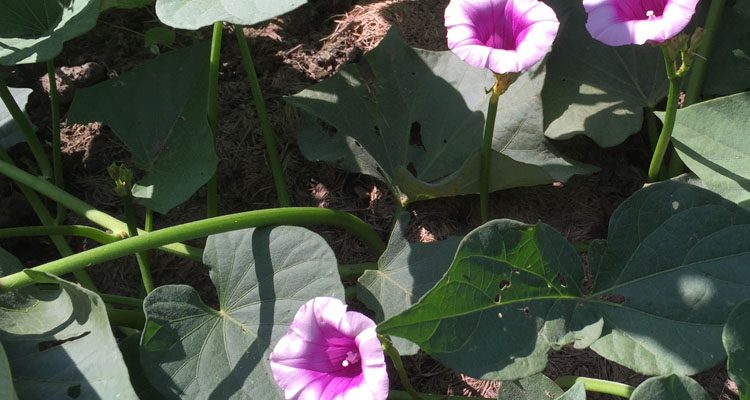
This month’s cover picture shows Sweet Potato plants in bloom. Sweet potatoes are in the same family as Morning Glories, so the blossoms look very similar.
Welcome to the October edition of Betty’s Garden Diary. We still have potatoes, sweet potatoes, peppers, okra, cabbage, and tomatoes in the garden, but most of this edition of the Garden Diary deals with getting a soil test for your garden. Before we do that, we are going to discuss how to manage your fall leaves and what to do with your dahlias and geraniums to get them through the winter.
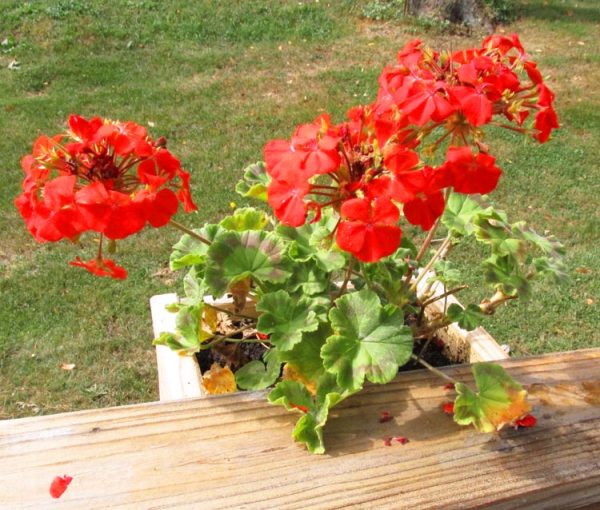
One of Betty’s Geraniums
Back in the June edition of Betty’s Garden Diary, we showed our homemade planter boxes into which Betty had planted geraniums that were given to her by our daughter. Those geraniums bloomed almost constantly all summer. Unfortunately, they are not winter hardy. Before the first frost kills them, we will remove the geraniums from the planter boxes and gently clean all of the soil from the roots. Then, we will bundle them together with a cord around the stem about where it went into the soil and simply hang them upside down in the cool dark part of our basement where we store our canned goods. That part of our basement is separated from the rest of the basement by a masonry wall. As a result, it maintains a temperature of 45-50 degrees all winter. That is where we also store our potatoes and sweet potatoes. If we remember, we will bring the geraniums out of storage a couple of times during the winter and wet the roots, but we usually forgot to do so in the past and they still survived the winter. After we remove the geraniums from the planters, we will add the soil to the compost pile and put the planter boxes in a dry place for winter storage.
When we are ready to plant the geraniums next spring, we will remove all of the dead leaves. The plants will look terrible except that tiny bits of live growth will be visible. We will simply replant them in fresh potting soil and give them a drink. If one or two of them fails to make it through the winter we will root a couple of cuttings from some of the plants that survived.
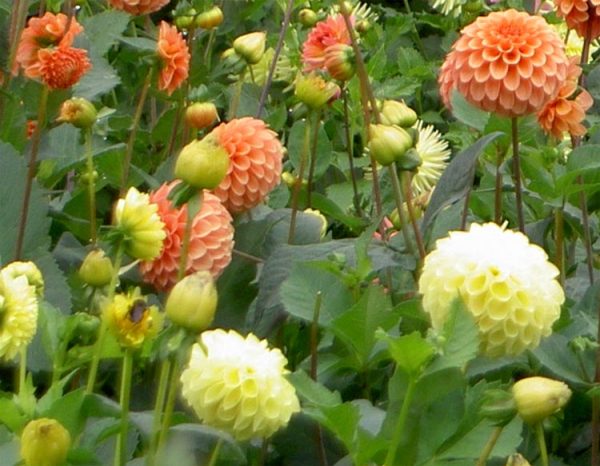
Dahlias
Betty and I used to grow lots of dahlias in our garden although we have not done so for the last few years. Dahlias get big and produce huge flowers. In order to keep them from falling over due to the weight of the flowers, dahlias need to be staked like tomatoes. They grow from tubers that branch out just underground from the base of the stem. Dahlias are not winter hardy in this part of the country. Therefore, you need to cut off the stalks and dig them up for winter storage. The best time to do so is a week or two after the first killing frost. That couple of weeks of delay after the frost has killed off the tops helps the tubers to mature. If we get into late November and have still not had a killing frost, I would dig them anyway so that a surprise freeze doesn’t kill them. Use a spading fork or shovel to lift the plants carefully to avoid damaging the tubers. Cut the stalks an inch or two above the tubers and then use a garden hose to clean off all of the soil. A good way to store the dahlia tubers is to get a large cardboard box and put several layers of newspapers in the bottom. Then put a layer of slightly dampened sand or peat moss into the box and set the tubers on top of it. Add another layer of peat and another layer of dahlia tubers, etc. Store the dahlia tubers in a cool dark place. Do not use plastic storage containers because the tubers need to breathe. Ideally the temperature of the storage area should be around 45-50 degrees. Although dahlias can be divided in the fall, we always did so in the spring when we were ready to plant them. Since dahlias cannot survive a hard freeze, the best time to plant them in the spring is when you are planting the rest of your garden after the soil temperature has reached about 60 degrees. At that time, you can divide the tubers and give some to your friends.
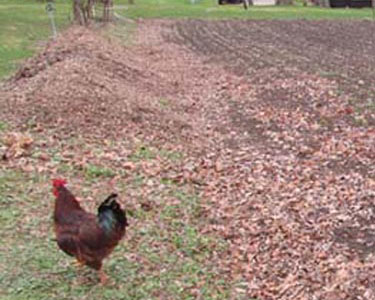
The picture above appeared in the March edition of Betty’s Garden Diary. Part of our collection of fall leaves is visible in the background. The photo was actually taken around the middle of November last year after we had collected about half of our fall leaves. The reason that some of the leaves appear to be scattered on part of the garden in the foreground is that they were blown there when they came down and we didn’t want to walk or drive on the damp tilled garden soil to collect them. We collected the leaves in the picture during last October and November and piled them in a ridge along the uphill side of our garden. During the summer, we also added kitchen scraps and the leftovers from our canning efforts to the pile. Several times throughout the summer, we used a pitchfork to turn over the pile. By the middle of September, those leaves had broken down to rich compost which we spread over the garden before doing the first fall rototilling. In a few weeks, God will paint the fall colors onto the trees and the cycle will begin again. We invested in a set of “High Lift” blades for the mower deck on our lawn tractor. The guy at the tractor dealership called them “Bagger Blades.” The mower came with general purpose blades which are designed to cut the grass into finer clippings by not generating a lot of air flow. However, the chute on our bagger kept plugging up. As I was complaining about that to a friend, she advised me to get the “High Lift” blades, so I did some online research and found a local dealer who sold them. They were expensive at about $50.00 for a set, but they instantly ended the plug up problem so they were worth every cent. Because of the increased airflow, we also found less stuff pasted to the underside of the mower deck when we removed it to sharpen the blades. When the leaves come down, we will collect them and pile them along our garden where we will compost them until next fall when we will put them onto the garden. Because fall leaves have a very high carbon-nitrogen ratio, they should be composted before they are added to the garden.
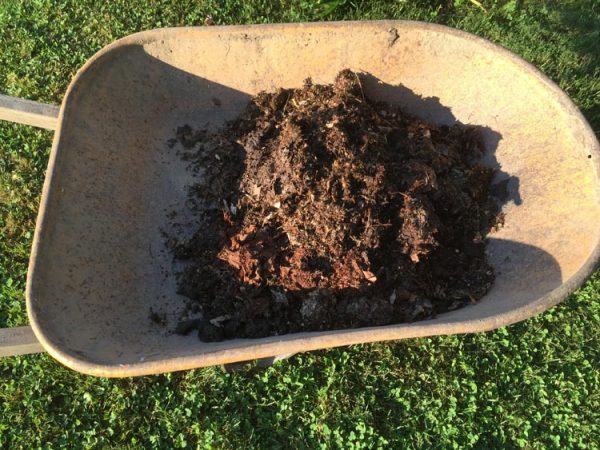
This is what the leaves looked like after composting for almost a year.
This is the proper time of year to take samples for a soil test for your garden. The West Virginia University Soil Testing Laboratory provides free soil tests for farmers and home gardeners. Be sure to visit their web site and read all of their instructions before you submit your soil samples. The reason that soil tests are conducted in the fall is that the samples are less likely to be altered by gardening activities during the summer such as the addition of lime, fertilizer, or mulch. Even a tiny amount of fertilizer or lime can alter the results of the soil test. Since most people apply fertilizer during planting time in the spring, three or four months have transpired by now, so that fertilizer has become part of the overall soil chemistry. If you have applied lime or fertilizer within the last month, then you should delay taking soil samples. Another reason to take your soil samples now is to enable the lab to have enough time to process those samples and return them to you in plenty of time for you to evaluate the results and apply lime or fertilizer as indicated for the garden that you will plant next spring.
In order to get an accurate analysis of the soil in the garden, it is important to follow a few guidelines when you are taking the soil samples. Although it is not essential, I like to do the fall rototilling of the garden before collecting the samples. Think about your garden as if it is a huge flower pot. The plants obtain most of their nutrients from the top six inches or less of the soil. For that reason, your soil samples should only include material from the top five or six inches of soil in your garden. Choose a day to collect the soil samples when the garden is not too wet. The soil should easily crumble in your hands. Think about the moisture content that you want when you are doing the spring planting. Remember that you are also going to be walking all over the garden and don’t want to compact the soil. If the soil is too wet, the samples will form hard clods as they dry.

This drawing shows how we collected the 20-25 random soil samples from our garden.
Betty’s Garden is rectangular and it measures 50 by 100 feet. To get an accurate overall evaluation of the garden, we took 25 or so samples of the topsoil from that 5000 square foot area. We sampled from only the top five to six inches of soil. Each of those samples consisted of around a pint or of soil. We had just completed the fall tilling, so the soil was loose and easy to sample. We mentally divided the garden into a grid and took the samples from a lot of different locations.
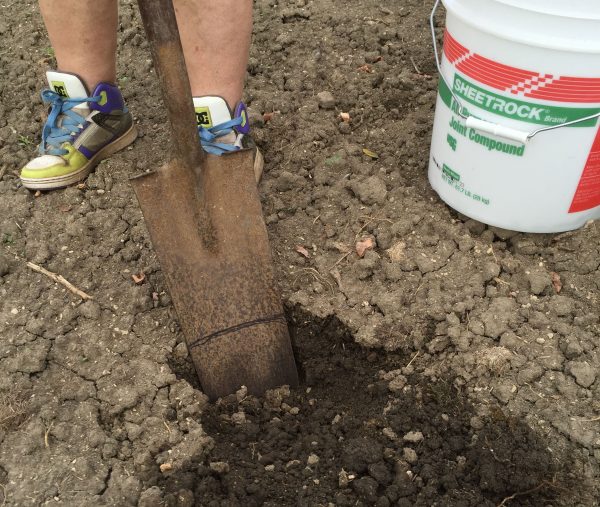
Taking a Soil Sample
There are several options for taking your soil test samples. One is a soil test probe. Another option is a soil auger. I have an old dynamite auger which I inherited from the farm where I grew up. Both of those tools are great if you are taking soil samples from the lawn because they do not disturb the sod very much. If you want to have the soil from your lawn tested and you don’t have a soil test probe or dynamite auger laying around, obtain a 10 to 12 inch long piece of one inch pipe or electrical conduit. Place a mark on it five inches from one end. Then, use a hammer to tap it into the soil up to the mark. You should be able to pull out a plug of soil. Use a dowel or metal rod to punch the plug of soil out of the pipe. If you are going to use this method, do so when the lawn is a little damp otherwise, you may have a hard time getting the plugs of soil out of the tube! The soil chemistry of your lawn is not the same as the soil chemistry of your vegetable or flower garden, so be sure to keep the samples from the lawn separate from those from the garden and submit them to the lab as two different samples. Make sure to indicate that it is a lawn on the soil survey document that accompanies the sample.
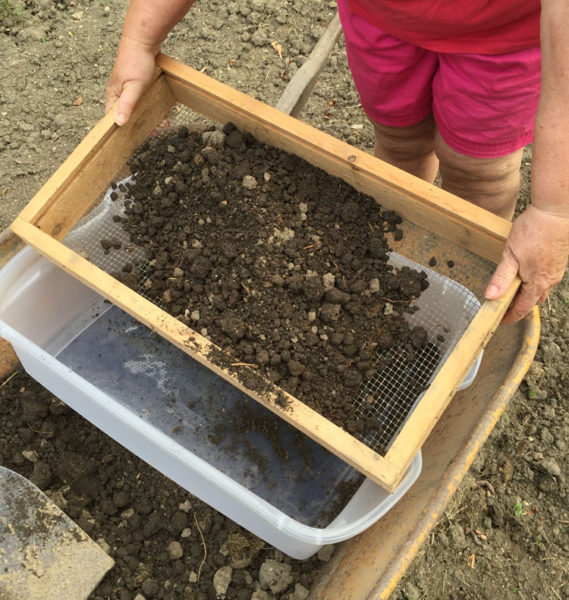
Sifting the composite soil sample.
For a garden where the soil has been tilled, a garden trowel or spade works fine for taking soil samples. We used a felt-tipped marker to put a line on the spade at the five inch mark. Then, we dug a small hole about five inches deep. After that, we used the spade to get a one inch thick slice of the topsoil from the back of the hole. The soil in our garden is quite loose, so the spade worked well for obtaining the samples. We created a composite sample from our garden to send to the soil testing lab by combining the 25 or so samples collected from random locations in our garden in a wheelbarrow and mixing them together using a hoe as if we were mixing concrete. Then, we sifted a couple of quarts of the soil from the wheelbarrow into a clean seedling flat using a ¼ inch screen to remove the larger bits of plant material and the clods and stones. We air dried the soil in the flat keeping it out of direct sunlight. To aid that process, we stirred the soil from time to time. The soil sample needs to be dry when you mail it to the lab for a couple of reasons. One of them is that wet soil weighs more making it more expensive to mail. Also, bacteria and fungi may begin to grow in a wet soil sample thereby distorting some of the results.
After it was dry, we put about a pound of our composite soil sample into the plastic soil test mailer bag as directed and sent it to the soil testing lab. The soil test mailing kits are available at the Soil Testing Lab in room G083 of the Agricultural Sciences Building at WVU or at the local county extension offices.

Soil Test Questionnaire Picture
When a soil sample is submitted to the lab, it must be accompanied by a questionnaire or “Soil Test Form.” The WVU soil test questionnaire can be downloaded in PDF format at this site. Just print it out and fill it in with the information about your sample. If you are unsure of how to answer some of the questions, you may contact the local cooperative extension office for assistance or leave the items blank. For example, you may be unsure of the soil texture. Be sure to indicate the crop using the codes on the form so that the lab can properly advise you regarding any needed soil treatments. If you submit more than one sample to the lab, make sure to label the samples on the questionnaire using the “Sample ID” box and on the plastic bags. For example, you might have one sample labelled “Garden” and another labelled “Lawn.”
A few weeks after you submit your sample, you will receive a Soil Test Report from the lab. We actually submitted the soil sample for Betty’s garden last October. The report for that sample indicated that Betty’s garden had very high levels of phosphorous (P), potassium (K), calcium (CA), and magnesium (MG). The soil pH was neutral. Because of those levels, we did not add fertilizer containing any of those elements to our garden this summer. Since all of those elements are retained in the soil, those levels will remain very high for a number of years. Like a lot of home gardeners, we used to routinely add a little 15-15-15 fertilizer to our garden every year. Over the years, the phosphorous and potassium levels built up to the very high levels. Adding more of those elements to our soil would eventually make those levels high enough to be toxic to the plants.

Nicodemus Soil Test Results
The bottom portion of your soil test report will include specific recommendations for your soil that apply to the use that you indicated on the questionnaire. If your soil pH is low indicating an acid soil, the report will advise you regarding the amount of agricultural lime to apply to bring the pH up to the recommended 6.5 to 6.8 range. Do not exceed that recommendation. Most garden plants do best in soil with a pH in that range. If you add excess lime, you will make the soil too alkaline which will hinder the growth of those garden crops. If you send in a sample from your lawn, you will notice that the recommendations on your soil test report look a little different from those for your garden. One thing that you will notice is that the recommended amounts of things like fertilizer and lime for your garden are very small. Many home gardeners actually over fertilize their gardens thereby reducing the productivity of those gardens. More is not always better.
Since the WVU soil test lab provides the service to home gardeners for free, every gardener should take a few minutes and have a soil test done. By following the recommendations in those soil test results, you could see a dramatic increase in the productivity of your home garden.
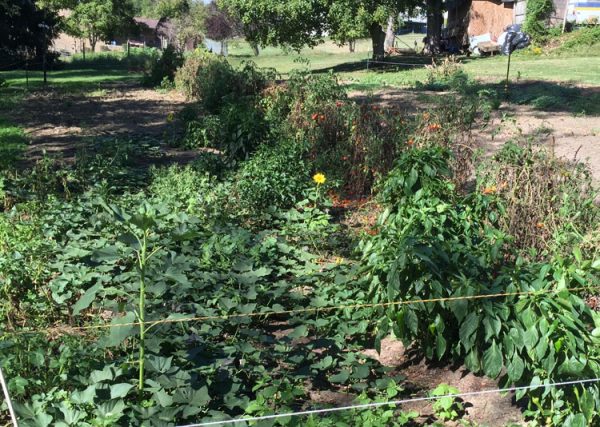
Betty’s Garden in the morning on September 28, 2016
This morning, we awoke to a clear, crisp, cool fall morning with bright sunshine and a beautiful blue sky. I went out to the garden and took the above photo to show what is left in our garden. Our potatoes and tomatoes are almost finished, but our peppers and sweet potatoes love this weather. I picked a tomato and ate it right in the garden. No grocery store tomato ever tasted so good. By the time you read this, fresh tomatoes may be gone until next year! Since we set out last December to produce this series for one year, the November issue of Betty’s Garden Diary will be the last. Betty and I hope that you have found this series useful. Please remember to add your comments and to share your gardening ideas. – Earl