

If you are a member of my generation, you will remember the card catalog at the library. If you are a youngster, those may have gone the way of the dinosaurs and been replaced by an electronic card catalog on a database by the time you visited the library. Back in the day, we would go to the card catalog which was organized by subject, title, or author and research our topic by looking through the cards.
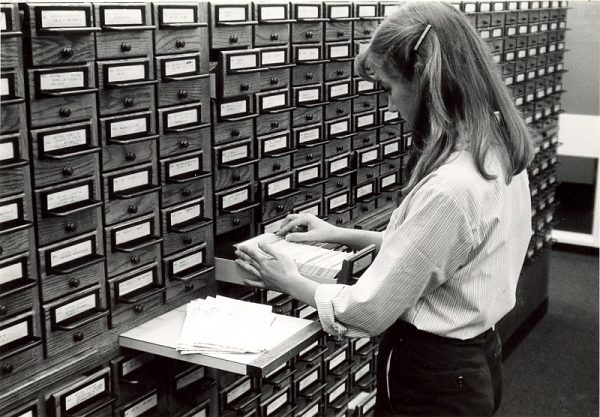
Let’s say that I was interested in Sherlock Holmes books. I would look at the author index under Sherlock Holmes either in the card catalog or in the electronic catalog. Then, I would use the Library of Congress or Dewey Decimal number to locate the book on the shelf in the library. Suppose that someone removed the card for the book, “Hound of the Baskervilles” from the card catalog or that they deleted that title from the database. Even though the book was still on the shelf, I would not know it, so it would be unavailable for me to check out unless I happened to see the book on the shelf.
By now, you are wondering what deleted catalog cards have to do with the data on your hard drive or flash memory card, so I will explain.
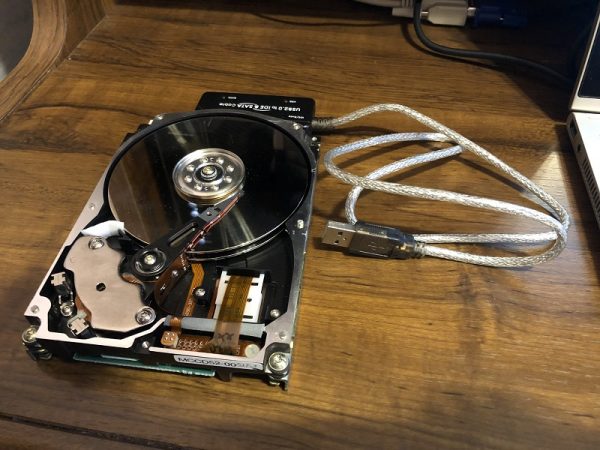
Your hard drive stores data magnetically. When you save a file, a tiny electromagnet magnetizes a section of the surface of one of the disks in the drive. The drive above contains two disks. Depending on the system used to format your hard drive, the disk contains a File Allocation Table (FAT) or a Master File Table (MFT), which serves as a sort of index of the files on the drive. The newer disk formatting system uses the MFT, but some flash memory devices still use the FAT system.
When you need to access the file, computer consults the FAT or MFT, which tells the computer where that file is stored on the disk. Then, the read-write head in the hard drive is able to read the magnetic impulses from the disk and your file appears. Deleting a file from your hard drive removes it from the MFT (disk directory).
However, the file still exists on the disk until some other file reuses the same portion of the disk surface and magnetically overwrites it just as the book still exists on the shelf after the library card has been removed. Until that disk surface has been overwritten, a data recovery program can usually retrieve the deleted file. A free data recovery program entitled “Recuva” can be download here. Recuva can find and retrieve those deleted files unless they are overwritten.
Back in 2003, two graduate students from MIT decided to find out what they could recover from old hard drives. They purchased 158 used hard drives from eBay and other sources. One hundred twenty-nine of those 158 drives were functional. Of those, 12 had been properly sanitized making the deleted data unrecoverable. Sixty percent of the hard drives had been reformatted before they were sold by the original owners. The original owners had deleted their files, but had not reformatted most of the remaining drives.
On those drives, the data was easily recovered using the Windows “undelete” function. The students used software similar to Recuva to recover data from the drives that had been formatted. What they found was stunning. One of the hard drives had been used in an ATM. Some others had been used in businesses. The students recovered over 5,000 credit card numbers along with detailed personal and corporate financial records. They found a mountain of personal e-mails and an enormous amount of pornography. You can read more about that study at this site.
Several months ago, I overheard a conversation in a group of people where a gentleman was talking about how he ensured the safety of the personal information on his laptop. He said that he did not want anyone snooping into what websites he visited, so he always cleared the Internet history files and the disc cache after he had been online. When he had purchased a new laptop, he deleted all of his personal files and then reformatted the hard drive to be doubly sure that nobody could recover those files. Then, he gave his old laptop to one of his daughter’s friends. I did not make any comment even though I knew that most of his files were still easily recoverable.
So how do you protect yourself when you decide to upgrade and retire your old computer, smartphone, or tablet?
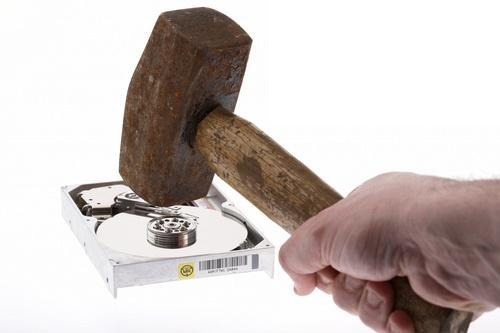
One option is to completely physically destroy the hard drive or flash memory in the device. In fact, there are companies that exist to provide that service for businesses and other institutions that need to protect sensitive data. They physically shred the hard drives and then recycle the resulting materials.
If you do not want to physically destroy the device, here are a few things you can do to help to sanitize the device before you pass it on.
Start by backing up everything on your laptop, phone or tablet. I recommend an external hard drive. You can purchase a one-terabyte external hard drive for less than $100. A two-terabyte external drive will cost just over $100. Usually, all you need to do to set up the external hard drive is to plug it into a USB port and wait. Create a folder on the external drive and then just drag all of your files onto it as if you were copying them from one folder to another. If you have a lot of files, you might need to take a lunch break or go for a walk while they are copying. Mine took over an hour the last time I backed up.
If you have never backed up your iPad or iPhone onto your PC, then click this link for a page on my website containing visual step-by-step instructions for doing so. By backing up your iPad or iPhone on a PC instead of on iCloud, you will not run out of iCloud storage and need to pay for more. The page includes instructions for transferring all of your photos and home videos to a folder on your PC, which you can then copy onto an external hard drive. After you do so, then you can delete them from your device.
After backing everything up, shut down your laptop and remove the external hard drive. I do this so that I don’t accidentally delete a file from my backup on the external hard drive.
After your files are all backed up, change your passwords for all of the sites that you log onto using that device. You might be surprised at how many there are! After you change the password for each site, all of your devices will be unable to log onto that site, so you will need to go onto your other devices and update them with the new passwords. Be sure to use a password that is completely different from the original. Remember that some of those passwords do not come up until you click on that site using your web browser. You should change your passwords frequently anyway. Be careful about using the same password for everything. If it is compromised on one site, then all of your other sites that have the same password are also compromised.
If you need to create a document listing your passwords because you cannot remember them all, then camouflage it with a file name that would not give it away. For example, I might add a page to the folder containing the Nicodemus Family Cookbook and call it “Grandma Nick’s Lard Pudding.” Then, I would put a lard pudding recipe on the first page followed by a story about how much we loved eating lard pudding. About the third page, I would start listing my passwords. No hacker would ever read more than a page or so of a document containing a recipe for lard pudding. (By the way, I don’t think that my grandmother ever made pudding using lard.)
After you have backed up your files and changed your passwords, delete all of your personal files from the device. Remember to delete any backups that are also on the internal hard drive on the device. If you have a lot of stuff on the device, this is going to take some time! Psychologically, deleting your files might be difficult because you do not want to risk losing those cute selfies you took. To overcome that issue, plug that external drive into another laptop and reassure yourself that your files are safely backed up before you trash them on the old laptop.
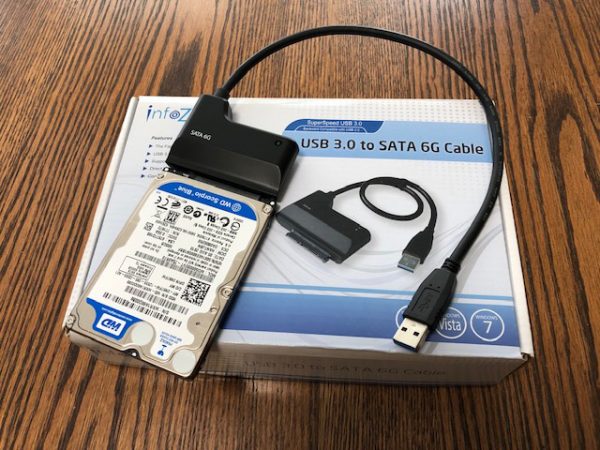
By the way, the password on your laptop does not keep someone from accessing the files on your hard drive even if that laptop has stopped working. I have an old laptop on which the screen no longer works. I used it in my office at WLU where I had an external monitor hooked up. That laptop still works with the external monitor. Even if it didn’t, the files on the hard drive of that machine are recoverable. All I need to do is open up the machine and remove the hard drive. Then, I could plug it into a USB port on another laptop using a kit that I bought online for under $20. It appears as an external hard drive, and I can easily copy the files by dragging them onto my desktop. I can use Recuva or a similar program to access the deleted files.
If you are retiring a smartphone, remember that the SIMM card does not hold your personal data. It contains the information needed to make the phone work on the network you are using, but your personal data is saved on the device’s internal memory. The good news is that most folks cannot recover deleted files from modern smartphones. After you delete all of your personal files from the phone, you can overwrite most of the vacated space on the phone’s internal flash drive by filling it completely full of stuff. If your phone has a lot of memory, that process will take some time. The fastest way to fill it up is to download a bunch of YouTube videos onto it.
I use a free program called aTube Catcher to download YouTube videos onto my laptop and then put them onto my iPhone or iPad using iTunes on my laptop. Click this link for complete step-by-step visual instructions for adding a video to your iPad or iPhone using iTunes on a laptop. Then, I can watch a movie when I am traveling by air or waiting in the doctor’s office. After I watch them, I delete them from the device using iTunes on the laptop.
If you load your old phone or tablet with as many videos as the memory in the device will hold, then you will overwrite most of the space where your old data files were located. Then, you can go to “settings” and reset the iPhone or iPad back to the factory settings. If any hacker is able to recover files from that phone, they will get passwords that do not work and movies from YouTube! However, they will need to be pretty sophisticated to be able to recover anything!
If you are retiring an old laptop, I recommend using a drive wiper or file shredder to overwrite the disk space where your deleted files are located. I use a free utility program called CCleaner. CCleaner is one of the most popular free downloads on the net with over 167 million downloads. The publisher is Piriform. Find the download page here. I use the free version of CCleaner. When you download CCleaner or any other free software, go slowly and make sure you are clicking the download link for the software you want to install and not the link for whatever software they may also be promoting. The last time I downloaded a CCleaner update, I noticed that they had a line that said “Install the free Google toolbar” with a box that was checked. Since you do not want to install that toolbar, be sure to unclick the box.
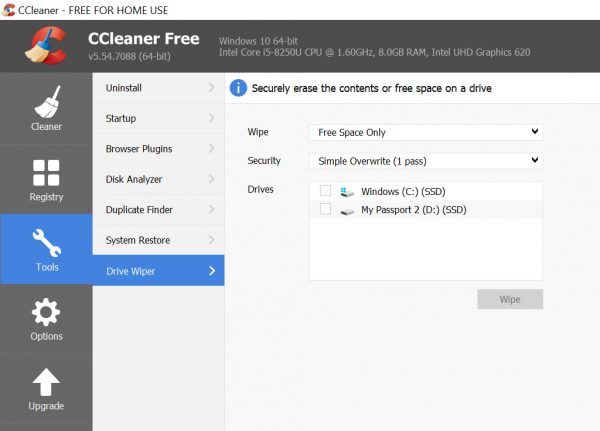
Originally listed under the name “Crap Cleaner,” CCleaner includes several useful utilities. If you click on the “tools” link, you will see a utility called “drive wiper.” Click that to open the drive wiper. By default, the wipe box should say “free space only.”
The other option is to wipe the entire hard drive. Make sure that you only wipe the free space. CCleaner will “wipe” the free space on your hard drive, including the spaces where your deleted files are located, by overwriting those disk locations with random junk. Under “security” you are given the option to overwrite those free spaces once, seven times or 35 times. I use the seven pass option because a somewhat sophisticated hacker might be able to retrieve files that are overwritten only once. If your laptop has a one terabyte hard drive, that seven pass overwrite will take several days, so be patient. If the laptop goes to sleep, wake it up and check on the progress.
If you are going to give your old laptop to a friend or family member, changing your passwords, deleting your files and then using a utility like CCleaner to overwrite the free space is all that you need to do.
If you are going to sell the machine or trade it or otherwise dispose of it so that it might end up in unknown hands, you will also want to delete all of the software that you have purchased and installed on the machine. The easy way to do so is to go to the “recovery” menu in the control panel and reset the machine to the factory settings. Even though you have manually deleted all of your files, opt for the complete reset which deletes all of your files just to be safe. Caution: This action cannot be undone! After you reset the machine to the factory specs, it will look exactly as it did when you took it out of the box. Remember to delete and overwrite your files first, though because the system reset does not overwrite them.
If this seems like a lot of effort, remember that you could simply physically destroy the hard drive. If you want to keep the laptop usable, sanitizing your personal data makes it much more difficult if not impossible for someone to obtain your personal information. I invite those of you who are cyber security experts to comment on this document. If you have other recommendations, please share them with us.
The next installation in this series will deal with online security including protecting yourself from scams and malware.